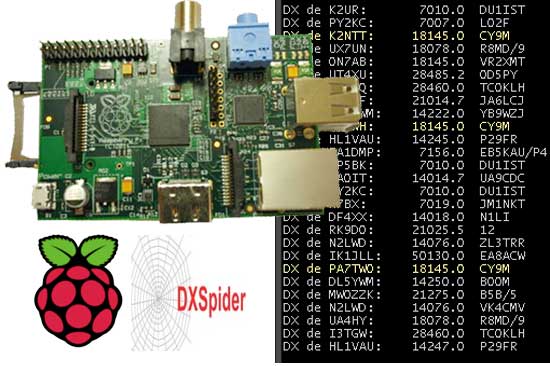
Das der Raspberry PI viele Einsatzmöglichkeiten im Amateurfunk bietet, ist sicherlich bekannt. Eine WSPR-Lösung für den Raspberry hat in den letzten Wochen für Beachtung gesorgt. Aber es gibt auch ganz spezielle Anwendungsmöglichkeiten. Zum Beispiel die Installation eines DX-Clusters auf Basis von DXSpider
Ein Server für ein DX-Cluster ist sicher eine Spartenanwendung unter den Funkamateuren. Aber ich wollte es einfach mal versuchen das bekannte DXSpider System auf meinen Raspberry PI zu installieren. Als jemand der nie ein Linux-Spezi war, ist oder sein wird, habe ich allerdings einige Mühe wenn sich Software nicht einfach per „apt-get install“ oder „aptitude“ installieren lässt. Die Installation von DXSpider auf einem Raspberry erfordert neben einigen zusätzlichen Paketen noch einige Einstellungen und Änderungen an Dateien bezüglich Eigentümer.
Mit der nachfolgenden Anleitung, gefunden auf der Webseite von N6WS, habe ich das DX-Cluster installieren können.
System Initialization
Auf der Konsole das Programm „raspi-config“ aufrufen. Es erscheint ein Menü mit folgender Ausgabe:
info                               Information about this tool
expand-rootfs                      Expand root partition to fill SD card
overscan                           Change overscan
configure-keyboard                 Set keyboard layout
change_pass                        Change password for ‘pi’ user
change_locale                      Set locale
change_timezone                    Set timezone
memory_split                       Change memory split
ssh                                Enable or disable ssh server
boot_behaviour                     Start desktop on boot?
update                             Try to upgrade raspi-config

Die Einstellungen wie folgt anpassen:
expand-rootfs - yes
- Select this option to expand the allocated storage space to fill you SD Card

configure-keyboard – select you keyboard
- Configure this for the keyboard you are using

change_pass
- This option adds a password for user – pi

change_locale - en-us
- Change to your local

change_timezone
- Set to your timezone

memory_split
- Leave as-is you can change it later

ssh
- enable secure shell

boot_behaviour
- a desktop is not needed for DXSpider, and just uses resources

update
- select update to retrieve all updates

Jetzt geht die Installation von DXSpider los:
$ sudo apt-get install mc
- mc is a good navigational tool with editor

$ sudo apt-get install wget
- wget is a good tool for downloading files off the Web

$ sudo apt-get install git-core
- git is the tool to retrieve DXSpider and future updates

$ useradd -m sysop
- follow the instructions to set the full name and password
- if you are not prompted for a password enter the following and add a password:
$ sudo passwd sysop
$ sudo adduser sysop sudo

$ sudo hostname n6ws-pi
- any hostname will do

$ sudo apt-get install libtimedate-perl
$ sudo apt-get install libnet-telnet-perl
$ sudo apt-get install libcurses-perl
$ sudo apt-get install libdigest-sha1-perl
$ sudo apt-get install libdata-dumper-simple-perl
- Adds the necessary perl modules for DXSpider

$ sudo su
# cd ~sysop

# ln -s ~sysop/spider /spider
# groupadd spider
# cd /etc
# mc
- navigate to the file /etc/group and add sysop after the group spider
- exit mc
# shutdown -r now

Nachdem neustart als User "sysop" einloggen
$ su - sysop
$ cd ~
$ git clone git://scm.dxcluster.org/scm/spider spider.new
$ cp -a spider.new/.git /spider
$ rm -rf spider.new
$ cd /spider
$ git reset --hard

$ sudo su
# cd /home/sysop/
# chown -R sysop.spider spider
# find . -type d -exec chmod 2775 {} \;
# find . -type f -exec chmod 775 {} \;
# exit

$ cd /spider
$ mkdir local
$ mkdir local_cmd
$ cp perl/DXVars.pm.issue local/DXVars.pm
$ cd local
$ mc
- edit DXVars.pm following the instructions in the comments
- exit mc

$ cd /spider/perl/
$ ./create_sysop.pl

$ cd /tmp
$ wget http://ftp.w1nr.net/usdbraw.gz
- The next step can take a few minutes
$ /spider/perl/create_usdb.pl /tmp/usdbraw.gz

$ cd /spider/src
$ make

$ cd /spider/perl
$ ./cluster.pl

- on a separate ssh or system console, log into the system as sysop

$ /spider/perl/console.pl

- from the command line of the console enter:
load/usdb

- Edit /etc/inittab to add the following two lines at the end of the file.
##Start DXSpider on bootup and respawn it should it crash
DX:2345:respawn:/bin/su -c "/usr/bin/perl -w /spider/perl/cluster.pl" sysop >/dev/tty6
[adrotate banner=“1″]
Das ist im Wesentlichen alles was getan werden muss um DXSPider auf dem Raspberry PI zum laufen zu bringen. Ohne diese Anleitung hätte ich es ganz sicher nicht geschafft. Ich selbst betreibe kein DXCluster, ich habe diese „Übung“ mehr oder weniger als Machbarkeitsstudie durchgeführt. Weil ich es einfach mal testen wollte.
Wer etwas weiterspielen möchte braucht sicher noch einigen Lesestoff für DXSpider.
- Installationsanleitung für DXSpider (engl.)
- Anleitung zur Administration von DXSpider (engl.)
- Handbuch zu Bedienung von DXSpider (dt.)
- originale Installationsanleitung für DXSpider auf einem Raspberry PI (engl.)
Was sonst noch nützlich sein könnte:
- Wer noch immer keinen hat… sollte sich jetzt einen Raspberry Pi kaufen :)
- Die Bücher vom mir hoch geschätzten Verlag „O’Reillys“ waren mir oft eine Hilfe und Motivation

[adrotate banner=“5″]


Hallo lbr OM,
ich kann machen, was ich will, ich bekomme DX Spider nicht auf den raspPi. Spätestens nach dem Neustart und einloggen als sysop geht es nicht weiter. Diverse Fehlermeldungen wie z.B. Verzeichnis existiert nicht, Hostname existiert nicht. etc.
Ich habe einen RaspPi Vers. 2 (512MB). Muss ich was beachten?
Matthias